Difference between revisions of "Composite Stapler"

From MakerFX Wiki!
Jump to: navigation, search
(Reformating Table)
Line 1: Line 1:
MakerFX has a composite stapler to secure material in a safer manner. Composite staples reduce the risk for damage to bits, projects, and more importantly humans. It does not completely remove all risk.
+
{|class="wikitable" style="width: 85%;"
 +
|Left Column
 +
|Right Column
 +
|-
 +
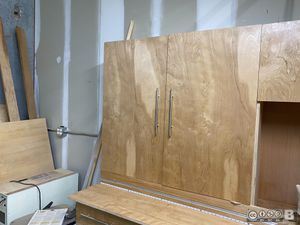
|style="width: 60%"|The composite stapler is located in the cabinet to the left of the miter saw station.
 +
|[[File:Cabinet with Stapler.jpg|frameless|300px]]
 +
|-
 +
 
 +
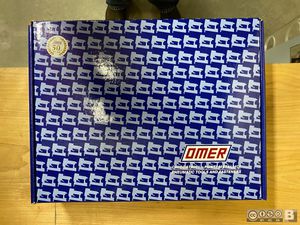
|style="width: 60%"|It is stored in its original box, please keep the box in good condition until we replace it.
 +
|[[File:Composite Stapler Box.jpg|frameless|300px]]
 +
 
  
{| class="wikitable" style="margin:auto"
 
|
 
|
 
 
|-
 
|-
| The composite stapler is located in the cabinet to the left of the miter saw station. || [[File:Cabinet with Stapler.jpg|frameless|200px]]
+
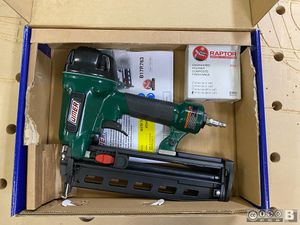
|style="width: 60%"|The composite staples are also stored in the same box. The stapler and the staples are used together. Do not mix and match items, it is a matched pair designed to work together.
 +
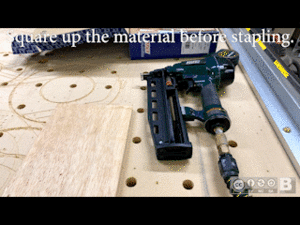
|[[File:Composite Stapler.jpg|frameless|300px]]
 +
 
 +
 
 
|-
 
|-
| It is stored in its original box, please keep the box in good condition until we replace it. || [[File:Composite Stapler Box.jpg|frameless|200px]]
+
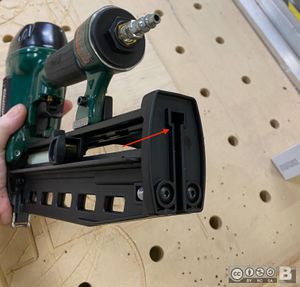
|style="width: 60%"|The staples are loaded from the rear of the stapler. Pull the slide on the side of the stapler back until it locks into place. Then load the staples through the slot in the rear and release the slide.
 +
|[[File:Staple Loading Slot.jpg|frameless|300px]]
 +
 
 +
 
 
|-
 
|-
| The composite staples are also stored in the same box. The stapler and the staples are used together. Do not mix and match items, it is a matched pair designed to work together. ||  [[File:Composite Stapler.jpg|frameless|200px]]
+
|style="width: 60%"|Once a week, a few drops of pneumatic oil needs to be dripped into the [fitting on the rear of the stapler. Check the sheet to see the last time it was done, if it was more than seven days ago please drip in two drops and update the log.]
 +
|Picture
 +
 
 +
 
 
|-
 
|-
| The staples are loaded from the rear of the stapler. Pull the slide on the side of the stapler back until it locks into place. Then load the staples through the slot in the rear and release the slide. || [[File:Staple Loading Slot.jpg|frameless|200px]]
+
|style="width: 60%"|Connect the stapler to the air system. There is an outlet and pressure control on the wall next to the CNC machine. Remember you have loaded and powered something that shoots projectiles at high speed. Consider it loaded and dangerous at all times.
 +
|[File:Air Drop by CNC.jpg|frameless|300px]]
 +
 
 +
 
 
|-
 
|-
| Once a week, a few drops of pneumatic oil needs to be dripped into the [fitting on the rear of the stapler. Check the sheet to see the last time it was done, if it was more than seven days ago please drip in two drops and update the log.] ||  
+
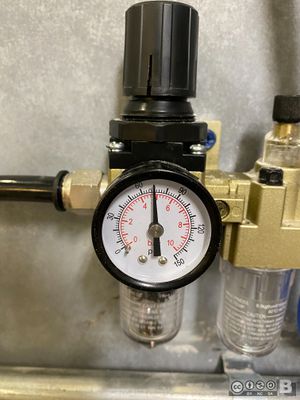
|style="width: 60%"|Typically 70PSI (pounds per square inch) will be the proper amount to seat the staple correctly. Do not adjust the pressure until after you have made a test staple. 70PSI seems to work well with multiple materials including hardwoods. You adjust the level with the black knob on the top of the gauge.
 +
|[[File:Pressure control.jpg|frameless|300px]]
 +
 
 +
 
 
|-
 
|-
| Connect the stapler to the air system. There is an outlet and pressure control on the wall next to the CNC machine. Remember '''you have loaded and powered something that shoots projectiles at high speed'''. Consider it loaded and dangerous at all times. || [[File:Air Drop by CNC.jpg|frameless|200px]]
+
|style="width: 60%"|Placeholder Text about using stapler
 +
|[[File:SqcAttachSmallAnimated.gif|frameless]]
 +
 
 +
 
 
|-
 
|-
| Typically 70PSI (pounds per square inch) will be the proper amount to seat the staple correctly. Do not adjust the pressure until after you have made a test staple. 70PSI seems to work well with multiple materials including hardwoods. You adjust the level with the black knob on the top of the gauge.|| [[File:Pressure control.jpg|frameless|200px]]
+
|style="width: 60%"|Placeholder Text about removing material
 +
|[[File:SqcRemoveSmallAnimated.gif|frameless]]
 +
 
 +
 
 
|-
 
|-
| Placeholder Text about using stapler || [[File:SqcAttachSmallAnimated.gif|frameless]]
+
|style="width: 60%"|Text
 +
|Picture
 +
 
 +
 
 
|-
 
|-
| Placeholder Text about removing material || [[File:SqcRemoveSmallAnimated.gif|frameless]]
+
|style="width: 60%"|Text
 +
|Picture
 +
 
 
|}
 
|}

Revision as of 13:25, 23 August 2022

Left Column Right Column
The composite stapler is located in the cabinet to the left of the miter saw station. Cabinet with Stapler.jpg
It is stored in its original box, please keep the box in good condition until we replace it. Composite Stapler Box.jpg


The composite staples are also stored in the same box. The stapler and the staples are used together. Do not mix and match items, it is a matched pair designed to work together. Composite Stapler.jpg


The staples are loaded from the rear of the stapler. Pull the slide on the side of the stapler back until it locks into place. Then load the staples through the slot in the rear and release the slide. Staple Loading Slot.jpg


Once a week, a few drops of pneumatic oil needs to be dripped into the [fitting on the rear of the stapler. Check the sheet to see the last time it was done, if it was more than seven days ago please drip in two drops and update the log.] Picture


Connect the stapler to the air system. There is an outlet and pressure control on the wall next to the CNC machine. Remember you have loaded and powered something that shoots projectiles at high speed. Consider it loaded and dangerous at all times. frameless|300px]]


Typically 70PSI (pounds per square inch) will be the proper amount to seat the staple correctly. Do not adjust the pressure until after you have made a test staple. 70PSI seems to work well with multiple materials including hardwoods. You adjust the level with the black knob on the top of the gauge. Pressure control.jpg


Placeholder Text about using stapler SqcAttachSmallAnimated.gif


Placeholder Text about removing material SqcRemoveSmallAnimated.gif


Text Picture


Text Picture