Difference between revisions of "Air-horn"
(Created page with "For the Power Racing Series part of the organizational and safety needs is an air horn to signal racers to start/stop, cautions, driver changes, etc. In the past we have used...") |
(→The Parts) |
||
| (6 intermediate revisions by the same user not shown) | |||
| Line 1: | Line 1: | ||
| + | Hazard Fraught Blunder-Horn 2000 | ||
| + | |||
For the Power Racing Series part of the organizational and safety needs is an air horn to signal racers to start/stop, cautions, driver changes, etc. In the past we have used standard disposable canned air horns. We decided that we could make a rechargeable air horn, using parts solely sourced from Harbor Freight Tools. The basic concept is to use the drill chassis, with its battery and switch to drive the air horn. | For the Power Racing Series part of the organizational and safety needs is an air horn to signal racers to start/stop, cautions, driver changes, etc. In the past we have used standard disposable canned air horns. We decided that we could make a rechargeable air horn, using parts solely sourced from Harbor Freight Tools. The basic concept is to use the drill chassis, with its battery and switch to drive the air horn. | ||
| Line 5: | Line 7: | ||
[https://www.harborfreight.com/12-volt-super-loud-air-horn-40134.html 12v Super Loud Air Horn] at time of publishing $13.99 | [https://www.harborfreight.com/12-volt-super-loud-air-horn-40134.html 12v Super Loud Air Horn] at time of publishing $13.99 | ||
| − | |||
| − | We used this drill because our local store was out of stock of the $ | + | [https://www.harborfreight.com/power-tools/cordless-drills/18v-lithium-38-in-cordless-drill-kit-64118.html 18v Lithium 3/8 in Cordless Drill] at time of publishing $39.99 |
| + | |||
| + | We used this drill because our local store was out of stock of the [https://www.harborfreight.com/power-tools/cordless-drills/18-volt-38-in-cordless-drilldriver-kit-with-keyless-chuck-21-clutch-settings-62873.html $20 Drill], make sure you find the [https://www.harborfreight.com/digitalsavings.html 20% super coupons], and always get the free flashlight. | ||
And of course some zip ties, solder and heat shrink. | And of course some zip ties, solder and heat shrink. | ||
== Build Steps == | == Build Steps == | ||
| + | |||
| + | [[Image:01_Horn_parts.jpg|center|480px|x]] | ||
First we opened up and understood how the air horn works. You get in the package, the two horns, a 12v air pump and a relay with miscellaneous hardware. We tested the whole setup using one of our normal drill batteries in house. The air pump motor is rated for 12v but its a basic brushed motor, and we aren't running it for very long, so 18v in short bursts should be ok. The air pump torques pretty hard so make sure you hold onto it when bench testing. | First we opened up and understood how the air horn works. You get in the package, the two horns, a 12v air pump and a relay with miscellaneous hardware. We tested the whole setup using one of our normal drill batteries in house. The air pump motor is rated for 12v but its a basic brushed motor, and we aren't running it for very long, so 18v in short bursts should be ok. The air pump torques pretty hard so make sure you hold onto it when bench testing. | ||
| + | |||
| + | [[Image:Split_open.jpg|center|480px|x]] | ||
After testing the horns we changed our direction to the drill itself, first taking all the screws out, make sure you take out the 4 around the silver bit (looks like metal..its not) there are 2 more screws hiding behind it. | After testing the horns we changed our direction to the drill itself, first taking all the screws out, make sure you take out the 4 around the silver bit (looks like metal..its not) there are 2 more screws hiding behind it. | ||
The drill motor, transmission and chuck come out simply, snipping the wires, we assumed correctly white is positive and black is negative. | The drill motor, transmission and chuck come out simply, snipping the wires, we assumed correctly white is positive and black is negative. | ||
| + | [[Image:Plastic_shells.jpg|center|480px|x]] | ||
A few space checks we decided to bandsaw the top half of the plastic, along one of the ridges and keeping a couple screws. | A few space checks we decided to bandsaw the top half of the plastic, along one of the ridges and keeping a couple screws. | ||
| + | [[Image:Bandsaw_Drill.jpeg|center|480px|x]] | ||
We then extended the wires that were soldered to the motor, and added spade crimps which push on to the back of the air pump. | We then extended the wires that were soldered to the motor, and added spade crimps which push on to the back of the air pump. | ||
| + | [[Image:Wires.jpg|center|480px|x]] | ||
Finally start with the Zip ties, getting the air pump in place. We did a second test with this assembly to make sure the horns still worked. | Finally start with the Zip ties, getting the air pump in place. We did a second test with this assembly to make sure the horns still worked. | ||
| + | [[Image:Bench_test.jpg|center|480px|x]] | ||
Continue with the zip ties, getting the horns in place. | Continue with the zip ties, getting the horns in place. | ||
| + | |||
| + | <gallery caption="Blunder Horn 2000" widths="300px" heights="300px" perrow="4"> | ||
| + | File:Finished1.jpg | ||
| + | File:Finished2.jpg | ||
| + | File:Finished3.jpg | ||
| + | File:Finished4.jpg | ||
| + | </gallery> | ||
Done! Test it out by annoying your favorite local high school robotics team. | Done! Test it out by annoying your favorite local high school robotics team. | ||
| + | [https://youtu.be/8VczCU4LuEc Video of testing the Horn] | ||
Latest revision as of 08:31, 28 October 2018
Hazard Fraught Blunder-Horn 2000
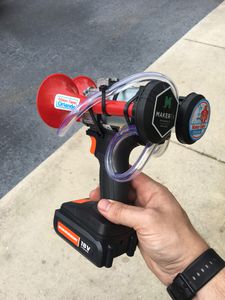
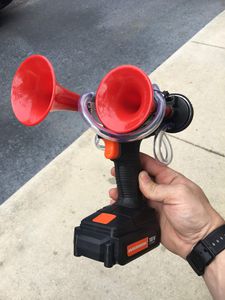
For the Power Racing Series part of the organizational and safety needs is an air horn to signal racers to start/stop, cautions, driver changes, etc. In the past we have used standard disposable canned air horns. We decided that we could make a rechargeable air horn, using parts solely sourced from Harbor Freight Tools. The basic concept is to use the drill chassis, with its battery and switch to drive the air horn.
The Parts
12v Super Loud Air Horn at time of publishing $13.99
18v Lithium 3/8 in Cordless Drill at time of publishing $39.99
We used this drill because our local store was out of stock of the $20 Drill, make sure you find the 20% super coupons, and always get the free flashlight.
And of course some zip ties, solder and heat shrink.
Build Steps
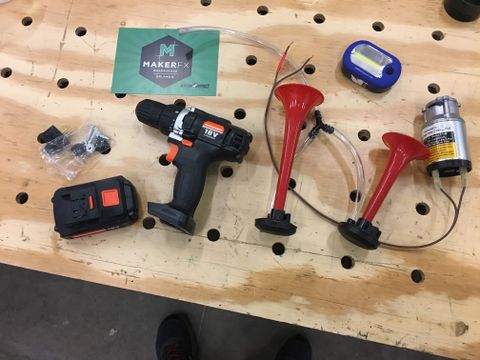
First we opened up and understood how the air horn works. You get in the package, the two horns, a 12v air pump and a relay with miscellaneous hardware. We tested the whole setup using one of our normal drill batteries in house. The air pump motor is rated for 12v but its a basic brushed motor, and we aren't running it for very long, so 18v in short bursts should be ok. The air pump torques pretty hard so make sure you hold onto it when bench testing.
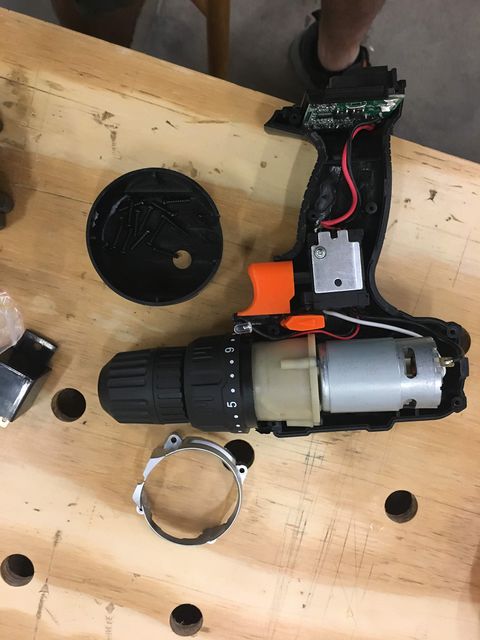
After testing the horns we changed our direction to the drill itself, first taking all the screws out, make sure you take out the 4 around the silver bit (looks like metal..its not) there are 2 more screws hiding behind it.
The drill motor, transmission and chuck come out simply, snipping the wires, we assumed correctly white is positive and black is negative.
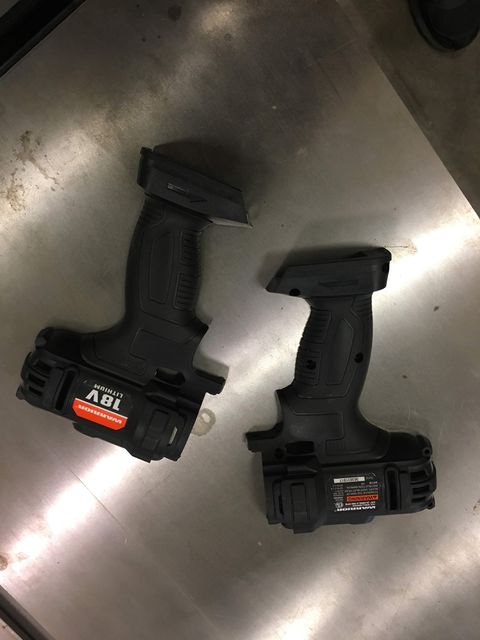
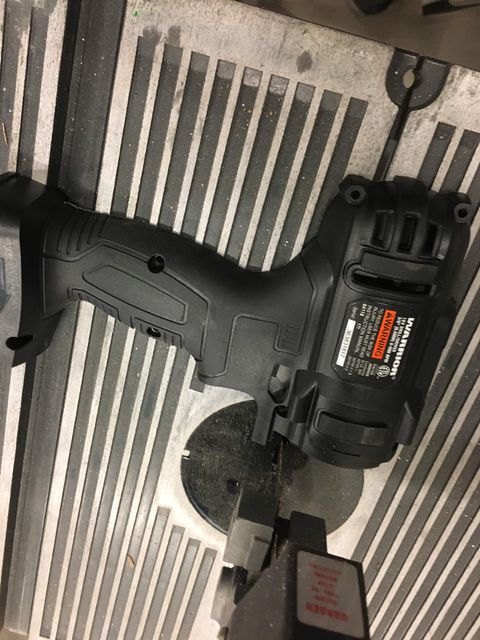
A few space checks we decided to bandsaw the top half of the plastic, along one of the ridges and keeping a couple screws.
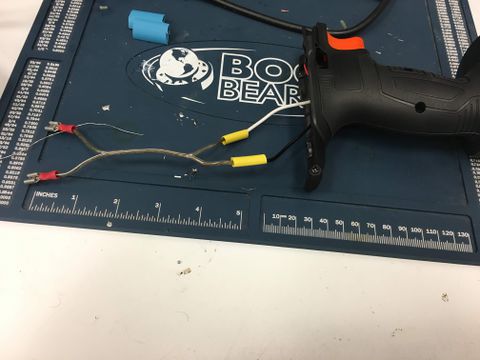
We then extended the wires that were soldered to the motor, and added spade crimps which push on to the back of the air pump.
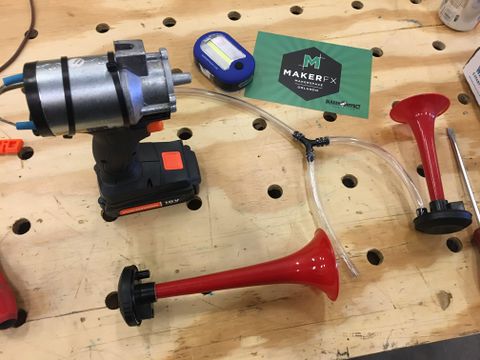
Finally start with the Zip ties, getting the air pump in place. We did a second test with this assembly to make sure the horns still worked.
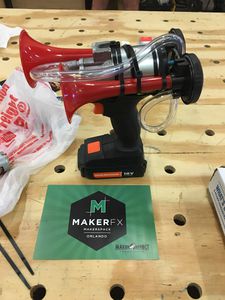
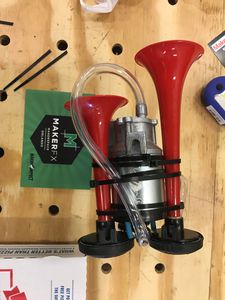
Continue with the zip ties, getting the horns in place.
- Blunder Horn 2000
Done! Test it out by annoying your favorite local high school robotics team. Video of testing the Horn
