Difference between revisions of "How to Change or Refill the Bobbin"
(→Step 2: Place one drop of clear sewing machine oil at the point where the rotating hook rests. wipe away any excess oil with a tissue or paper towel.) |
|||
| (3 intermediate revisions by the same user not shown) | |||
| Line 43: | Line 43: | ||
<div style="clear: both"></div> | <div style="clear: both"></div> | ||
| − | ====Step 2: Place '''one drop''' of clear sewing machine oil at the point where the rotating hook rests. | + | ====Step 2: Place '''one drop''' of clear sewing machine oil at the point where the rotating hook rests. Wipe away any excess oil with a tissue or paper towel. ==== |
[[File:Barudan_Oil_Rotating_Hook.png|border|500px|left|alt=Place one drop of clear sewing machine oil at the point where the rotating hook rests.]] | [[File:Barudan_Oil_Rotating_Hook.png|border|500px|left|alt=Place one drop of clear sewing machine oil at the point where the rotating hook rests.]] | ||
| + | |||
| + | <div style="clear: both"></div> | ||
| + | The approved sewing machine oil for lubricating the Bobbin Assembly Hook is kept on the Barudan Stand and looks like this. '''Do not use any other type of oil for this task.''' | ||
<div style="clear: both"></div> | <div style="clear: both"></div> | ||
[[File: Barudan_Sewing_Machine_Oil.png|border|350px|left|alt=Appropriate Sewing Machine Oil for lubricating Bobbin Assembly Hook.]] | [[File: Barudan_Sewing_Machine_Oil.png|border|350px|left|alt=Appropriate Sewing Machine Oil for lubricating Bobbin Assembly Hook.]] | ||
| Line 65: | Line 68: | ||
====Step 4: Close the door to the hook assembly arm. The bobbin thread should be seen hanging out the opening at the front. It will be threaded through the hole in the top when sewing begins.==== | ====Step 4: Close the door to the hook assembly arm. The bobbin thread should be seen hanging out the opening at the front. It will be threaded through the hole in the top when sewing begins.==== | ||
[[File: Barudan_Bobbin_Door_CLosed.png|border|500px|left|alt=Bobbin Assembly Arm Door Closed]] | [[File: Barudan_Bobbin_Door_CLosed.png|border|500px|left|alt=Bobbin Assembly Arm Door Closed]] | ||
| + | |||
| + | |||
| + | |||
| + | |||
| + | [[Sewing & Embroidery Zone|Return to Embroidery How To]] | ||
| + | |||
| + | ---- | ||
| + | [[Main_Page|Go to Main Page]] | ||
| + | |||
| + | [[Report_Dead_Links_Here|Report Dead Links]] | ||
Latest revision as of 15:06, 10 March 2023
You will find a box of pre-wound bobbins on the Bobbin Stand itself or on the storage shelf. If there are fewer than 10 bobbins in this box, please let the PoC know so that more may be ordered. Please do not use bobbins that were not purchased pre-wound on the Barudan.
Contents
- 1 Loading the New Bobbin into the Bobbin Case
- 1.1 Step 1: Hold the bobbin case with the front side down and the opening closest to your body.
- 1.2 Step 2: Place the bobbin into the case with the thread coming off to the right
- 1.3 Step 3: Drop the bobbin into the bobbin case
- 1.4 Step 4: Bring the thread through the slit in the edge of the bobbin and under the tension spring until it comes out the opening.
- 1.5 Step 5: Wind the thread through the metal pigtail on the front of the Bobbin Case.
- 1.6 Bobbin Installation Diagram
- 2 Replacing the Bobbin Case in the Bobbin Assembly Arm
- 2.1 Step 1: Check to be sure that there is no dust or thread inside the shaft of the bobbin book assembly.
- 2.2 Step 2: Place one drop of clear sewing machine oil at the point where the rotating hook rests. Wipe away any excess oil with a tissue or paper towel.
- 2.3 Step 3: Hold the latch open and slide it onto the post in the bobbin arm. Make sure the hanging thread is on top. Release the latch and press the bobbin case into position until a distinct "click" is heard. If you don’t hear the “click”, remove the bobbin case and try again.
- 2.4 CAUTION: DO NOT attempt to force the bobbin case into the hook assembly. If resistance is felt, remove the bobbin case, realign the case with the hook and reinsert it.
- 2.5 Step 4: Close the door to the hook assembly arm. The bobbin thread should be seen hanging out the opening at the front. It will be threaded through the hole in the top when sewing begins.
Loading the New Bobbin into the Bobbin Case
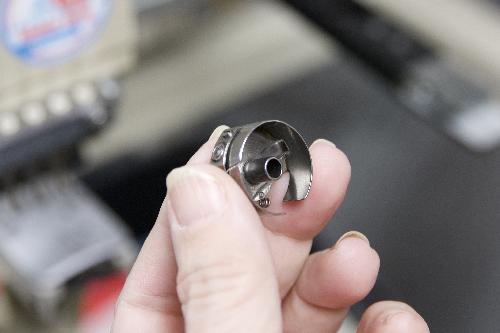
Step 1: Hold the bobbin case with the front side down and the opening closest to your body.
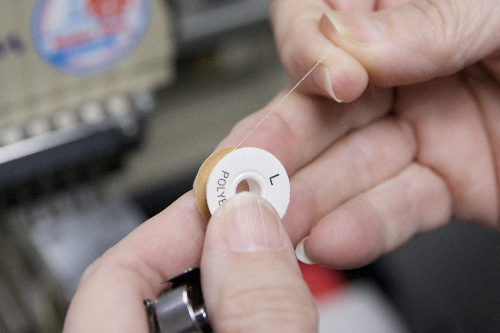
Step 2: Place the bobbin into the case with the thread coming off to the right
(Thread will be unwinding clockwise, or "making a 'q'")
Step 3: Drop the bobbin into the bobbin case
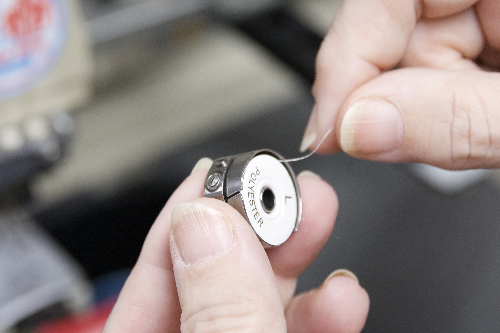
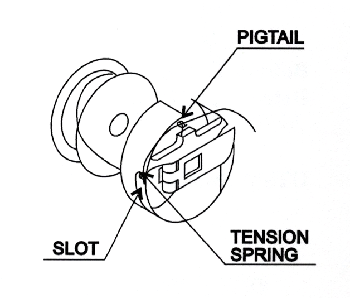
Step 4: Bring the thread through the slit in the edge of the bobbin and under the tension spring until it comes out the opening.
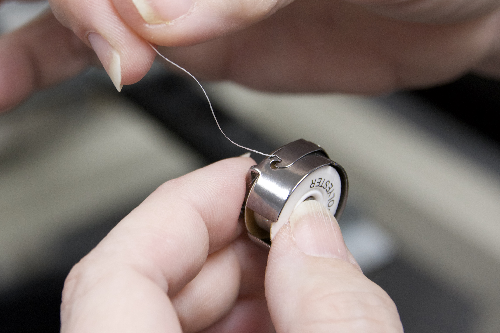
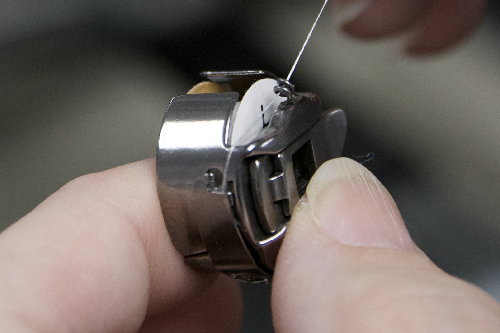
Step 5: Wind the thread through the metal pigtail on the front of the Bobbin Case.
The pigtail eliminates the need to push the end of the thread through; simply wind it through once. Leave several inches of thread hanging from the bobbin case.
Bobbin Installation Diagram
Replacing the Bobbin Case in the Bobbin Assembly Arm
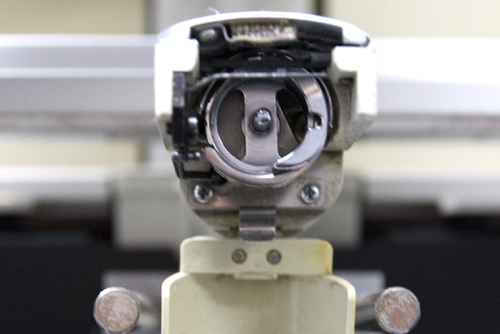
Step 1: Check to be sure that there is no dust or thread inside the shaft of the bobbin book assembly.
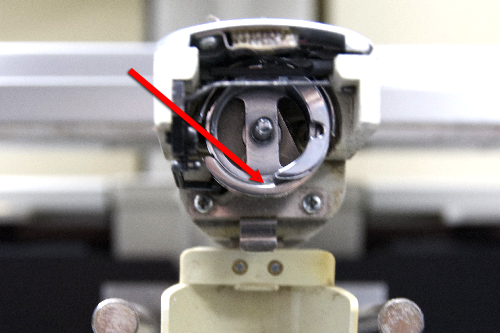
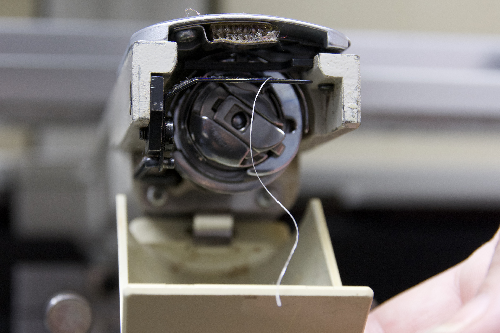
Step 2: Place one drop of clear sewing machine oil at the point where the rotating hook rests. Wipe away any excess oil with a tissue or paper towel.
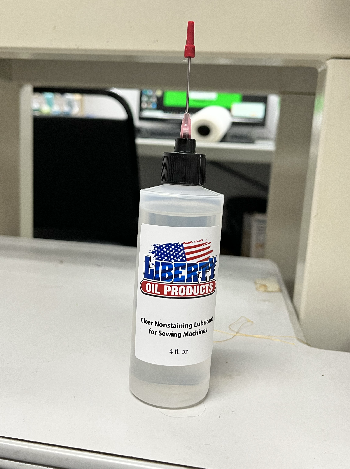
The approved sewing machine oil for lubricating the Bobbin Assembly Hook is kept on the Barudan Stand and looks like this. Do not use any other type of oil for this task.
Step 3: Hold the latch open and slide it onto the post in the bobbin arm. Make sure the hanging thread is on top. Release the latch and press the bobbin case into position until a distinct "click" is heard. If you don’t hear the “click”, remove the bobbin case and try again.
CAUTION: DO NOT attempt to force the bobbin case into the hook assembly. If resistance is felt, remove the bobbin case, realign the case with the hook and reinsert it.
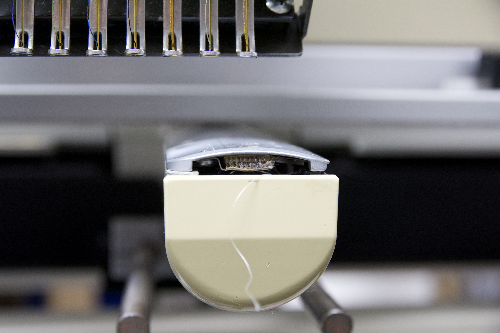
Step 4: Close the door to the hook assembly arm. The bobbin thread should be seen hanging out the opening at the front. It will be threaded through the hole in the top when sewing begins.
