Difference between revisions of "Deltamaker 2"
| Line 62: | Line 62: | ||
| 1 | | 1 | ||
| [http://things.deltamaker.com/support/DeltaMaker-Getting-Started-Guide.pdf#page=8 Calibration] | | [http://things.deltamaker.com/support/DeltaMaker-Getting-Started-Guide.pdf#page=8 Calibration] | ||
| − | |||
| − | |||
| − | |||
| − | |||
| − | |||
| − | |||
| − | |||
| − | |||
| − | |||
| [[File:Deltamaker-Calibration.jpg|400px|right]] | | [[File:Deltamaker-Calibration.jpg|400px|right]] | ||
| Need volunteer! | | Need volunteer! | ||
| Line 83: | Line 74: | ||
| 3 | | 3 | ||
| [http://things.deltamaker.com/support/DeltaMaker-Getting-Started-Guide.pdf#page=18 Instructions if you need to unload filament] | | [http://things.deltamaker.com/support/DeltaMaker-Getting-Started-Guide.pdf#page=18 Instructions if you need to unload filament] | ||
| + | |||
| + | 1. Make sure your DeltaMaker 3D Printer is at temperature (230°C). | ||
| + | |||
| + | 2. Grasp the filament directly below the extruder drive, and pinch the trigger. | ||
| + | |||
| + | 3. PUSH a few centimeters of filament into the extruder, and observe a string of melted filament exiting the nozzle. | ||
| + | |||
| + | 4. Then, SLOWLY PULL the filament out of the extruder, and recoil it on your filament spool. | ||
| + | |||
| | | | ||
| Need volunteer! | | Need volunteer! | ||
Revision as of 15:59, 31 August 2018
REMEMBER To Reserve Time!
Various tools such as the lasers (Epilog or Audrey), 3D Printers, and Forest CNC need to be reserved before using the tool. Review the Slack channel for the tool to reserve time.
- All 3D Printers (channel: mfx-3d-printing)
- Laser Epilog (channel: mfx-laser-epilog)
- Laser Audrey (channel: mfx-laser-audrey)
- Laser Boss 1630 aka Bruce (channel: mfx-laser-boss-1630)
- Forest CNC (channel: mfx-cnc)
NOTICE!
PLA only! No PETG or ABS / Local Source for PLA (Get MakerFX discount code from zone manager)
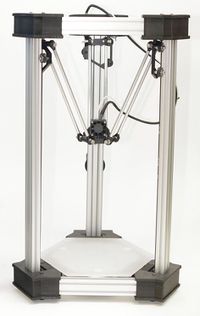
DeltaMaker Printers at MakerFX
The DeltaMaker printers have OctoPrint built-in which includes a built-in slicer. Click any of the printers below to be directed to OctoPrint.
Login as admin with password of 3dadmin to operate the printer.
deltamaker-0197 |
deltamaker-0187 |
deltamaker-0168 |
 |
|
|
| http://192.168.1.98 | http://192.168.1.204 | http://192.168.1.202 |
| 240mm hexagon x 260 mm | 240mm hexagon x 260 mm | 240mm hexagon x 260 mm |
| Heated Bed = NO | Heated Bed = NO | Heated Bed = NO |
| Nozzle = 0.40 | Nozzle = 0.40 | Nozzle = 0.40 |
Pre-Flight Instructions
Once these steps are completed, they do not need to be completed before each and every print in a given session. They only take a few minutes to complete and it will ensure you have a good experience with the printer.
| Step | Text Instructions | Screenshot | Video Instructions |
| 1 | Calibration |  |
Need volunteer! |
| 2 | Setting nozzle height |  |
Need volunteer! |
| 3 | Instructions if you need to unload filament
1. Make sure your DeltaMaker 3D Printer is at temperature (230°C). 2. Grasp the filament directly below the extruder drive, and pinch the trigger. 3. PUSH a few centimeters of filament into the extruder, and observe a string of melted filament exiting the nozzle. 4. Then, SLOWLY PULL the filament out of the extruder, and recoil it on your filament spool. |
Need volunteer! | |
| 4 | Loading filament | Need volunteer! | |
| 5 | Preparing to print | Need volunteer! |
Consumables
- Tape
- Sandpaper (80 grit)
- Purple Disappearing Glue Stick
Information