Difference between revisions of "3D Printing Zone"
(→General Policies for the 3D Printing Zone) |
|||
| (171 intermediate revisions by 2 users not shown) | |||
| Line 1: | Line 1: | ||
| − | [[ | + | [[Category:3D Printing]] |
| − | + | {{MFXReserveToolTime}} | |
| − | = | + | [[File:mfx_3d_printing_be_excellent_v1.png|400px|right|link=http://wiki.makerfx.org/images/3/3b/Mfx_3d_printing_be_excellent.pdf]] |
| − | [[ | + | {| class="wikitable" |
| + | |- | ||
| + | | style="vertical-align:top; text-align:left; background-color: #E5E7E9;" | | ||
| + | ''' | ||
| + | === [[3D_Printing_Model | Step 1: Get A 3D Model To Print]] === | ||
| + | ''' | ||
| + | | style="vertical-align:top; text-align:left; background-color: #E5E7E9;" | | ||
| + | ''' | ||
| − | [[ | + | === [[3D_Printing_Slice | Step 2: Get Ready To Print]] === |
| + | ''' | ||
| + | | style="vertical-align:top; text-align:left; background-color: #E5E7E9;" | | ||
| + | ''' | ||
| + | === [[3D_Printers | Step 3: Use the 3D Printers]] === | ||
| + | ''' | ||
| − | = | + | |- |
| − | + | | style="height:300px; background-color: white;" | | |
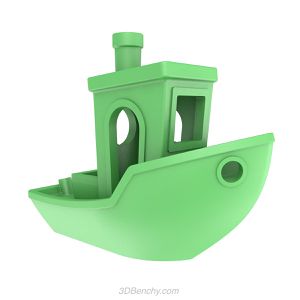
| − | + | [[File:3DBenchy.jpg|300px|center|link=3D_Printing_Model]] | |
| − | |||
| − | |||
| − | |||
| − | = | + | | style="height:300px; background-color: white;" | |
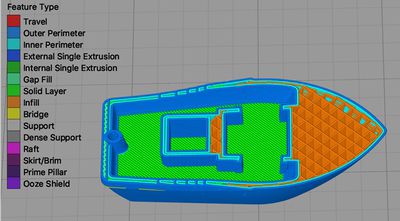
| + | [[File:3DBenchy Sliced.jpg|400px|center|link=3D_Printing_Slice]] | ||
| + | |||
| + | | style="height:300px; background-color: white;" | | ||
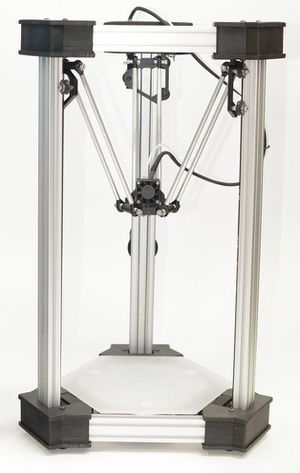
| + | [[File:Deltamaker.jpg|300px|center|link=3D_Printers]] | ||
| + | |||
| + | |- | ||
| + | | style="vertical-align:top; text-align:left; background-color: white;" | | ||
| + | * [[3D_Printing_Model | Learn how to design your own objects]] | ||
| + | * [[3D_Printing_Model | Learn where you can find objects on the internet]] | ||
| + | |||
| + | * [[Fusion 360 | Install and Learn Fusion 360]] | ||
| + | |||
| + | | style="vertical-align:top; text-align:left; background-color: white;" | | ||
| + | * [[3D_Printing_Slice | Learn how to "slice" a model and get it ready for printing]] | ||
| + | * [[Deltamaker 2 | Skip to Step 3 if you are printing on a DeltaMaker]] | ||
| + | |||
| + | | style="vertical-align:top; text-align:left; background-color: white;" | | ||
| + | * [[3D_Printers | Learn about 3D printers at MakerFX]] | ||
| + | * [[3D_Printers | Learn how to actually print your model]] | ||
| + | * [[Member_Owned_3D_Printers | Learn about other printers owned by members]] | ||
| + | |||
| + | * [[Deltamaker_2 | DeltaMaker page]] | ||
| + | * [[Creality_3D_Printers | Creality Printers page]] | ||
| + | * [[Monoprice_3D_Printers | Monoprice Printers page]] | ||
| + | * [[Flashforge_3D_Printers | Flashforge Printers page]] | ||
| + | |||
| + | |} | ||
| − | |||
| − | |||
| − | |||
| − | |||
| − | |||
---- | ---- | ||
[[Main_Page|Go to the Main Page]] | [[Main_Page|Go to the Main Page]] | ||
[[Report_Dead_Links_Here|Report Dead Links]] | [[Report_Dead_Links_Here|Report Dead Links]] | ||
Latest revision as of 17:12, 16 September 2018
edit
REMEMBER To Reserve Time!
Various tools such as the lasers, 3D Printers, and Forest CNC need to be reserved before using the tool. There is a link on each tool's wiki page, and in each tool's Slack channel to reserve time, or you can select the tool from the MakerFX PickTime page
Note: As of March 2025, we are implementing PickTime tool by tool - review the Slack channel for each tool for current status.

|
Step 1: Get A 3D Model To Print
|
Step 2: Get Ready To Print
|
Step 3: Use the 3D Printers
|
 |
 |
 |