Difference between revisions of "Forest CNC Set Job Home"
| Line 64: | Line 64: | ||
*Using the '''CNC Controls''', move Gantry away from edge to create space for probe using the X,Y & Z move buttons | *Using the '''CNC Controls''', move Gantry away from edge to create space for probe using the X,Y & Z move buttons | ||
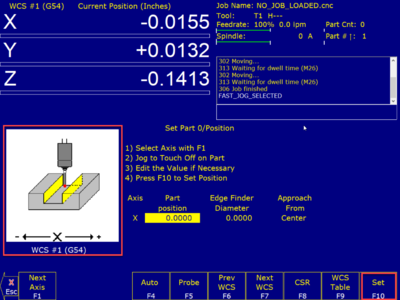
*Click the '''AUTO (F4)''' button and CYCLE START | *Click the '''AUTO (F4)''' button and CYCLE START | ||
| − | |||
| − | |||
| − | |||
| − | |||
*'''DO NOT''' press SET (F10) at this point. The Z value has been automatically set. | *'''DO NOT''' press SET (F10) at this point. The Z value has been automatically set. | ||
*Using the '''CNC Controls''', press '''Z+''' to move the bit away from the probe | *Using the '''CNC Controls''', press '''Z+''' to move the bit away from the probe | ||
| Line 74: | Line 70: | ||
[[File:CNC_F4_Auto.png|800px|left]] | [[File:CNC_F4_Auto.png|800px|left]] | ||
| + | |- style="vertical-align:top;" | ||
| + | | | ||
| + | *Test probe by clicking button to assure button click registers | ||
| + | *Put probe in place under the bit | ||
| + | *Click '''CYCLE START''' to initiate auto setting the Z home | ||
| + | *The CNC will move the Z axis to set the new Z Home value | ||
| + | |[[File:CNC_TTO_Tripped.png|400px|left]] | ||
|- style="vertical-align:top;" | |- style="vertical-align:top;" | ||
| Line 86: | Line 89: | ||
|[[File:CNC_F3_MDI.png|800px|left]] | |[[File:CNC_F3_MDI.png|800px|left]] | ||
[[File:CNC_Confirm_Home_A.png|500px|left]] | [[File:CNC_Confirm_Home_A.png|500px|left]] | ||
| − | |||
|- style="vertical-align:top;" | |- style="vertical-align:top;" | ||
Revision as of 20:50, 10 February 2021
edit
REMEMBER To Reserve Time!
Various tools such as the lasers, 3D Printers, and Forest CNC need to be reserved before using the tool. There is a link on each tool's wiki page, and in each tool's Slack channel to reserve time, or you can select the tool from the MakerFX PickTime page
Note: As of March 2025, we are implementing PickTime tool by tool - review the Slack channel for each tool for current status.
Follow these steps to set the home position for your job. Think about how you have defined the job in VCarve Pro and set the home position to match that design.
|
Steps
|
Visual
|
1. Secure the material
|
|
2. Move Gantry To Job Home - Get Close
|
|
3. Move Gantry To Job Home - Fine Tune
|
|
4. Set new Home coordinates
|
|
Set X Position
|
|
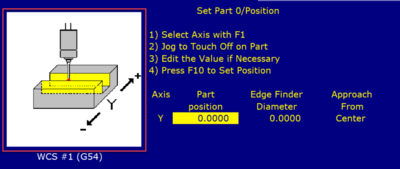
Set Y Position
|
|
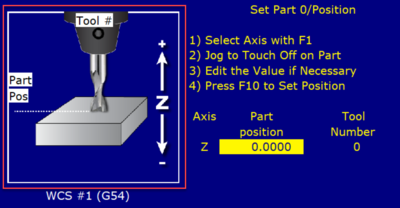
Set Z Position
|
|
|
|
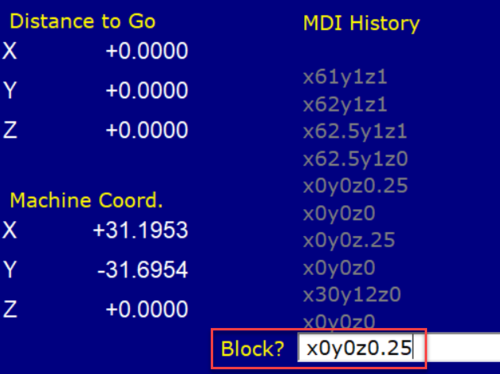
5. Confirm Job Home
|
|
SUCCESS
|
