How to Turn On the Barudan BENT-ZQ-201U
Revision as of 03:54, 11 March 2023 by Carol M Franklin (talk | contribs) (→Before You Mount the Hoop and Turn the Power On)
The Barudan BENT-ZQ-201U at our MakerSpace is a powerful tool, but it is not a new machine. This model was built between 1997 and 2003, so the technology isn't state-of-the-art, but it does work. When you are using the Barudan, remember to take things slowly and wait for the machine to respond before trying to move forward to the next step by pushing another button. If you confuse the machine, simply power down and start over.
Contents
- 1 Anatomy of the Automat
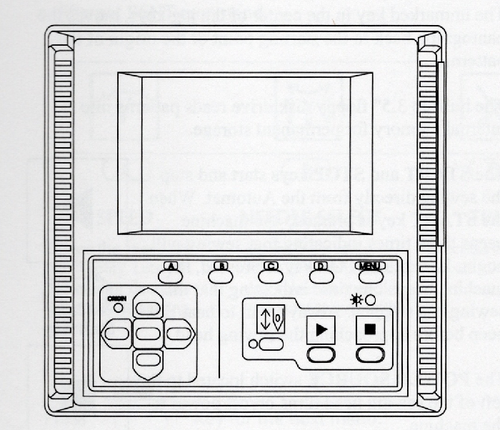
- 1.1 The Automat is where you will find all of the commands for operating the machine, for moving through various menus, and for executing menu commands.
- 1.1.1 The Automat has a LCD and a series of buttons. The icons about these buttons change according to the various functions being performed during the embroidery process.
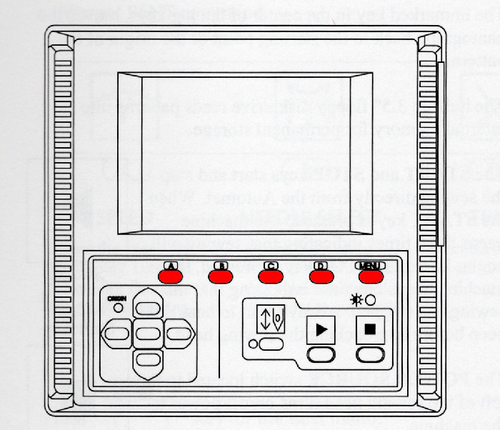
- 1.1.2 The Menu keys (A-D and Menu) correspond to the icons which are displayed above them on the LCD. The 'Menu' key moves to the next set of commands.
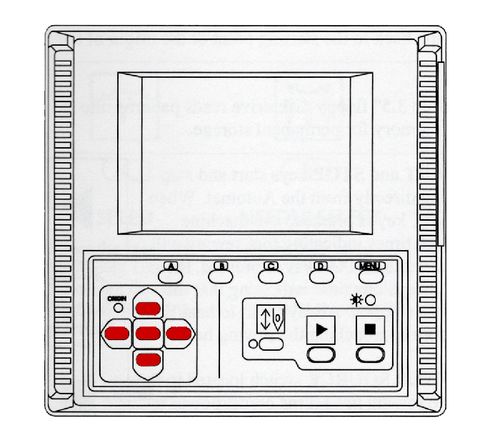
- 1.1.3 The set of Jog Keys allow you to move the pantograph to position the item you're embroidering under the sewing head. Pressing one of the keys moves the pantograph incrementally in that direction; press and hold a jog button to move more quickly.
- 1.1.4 The button under the Needle Icon is the Drive button. When Drive is engaged, the amber light is steady on. When the amber light is blinking, Drive is disengaged. The button under the green icon with the arrow is Start, and the button under the red icon with the square is Stop. if there are problems with the process, use the Stop button.
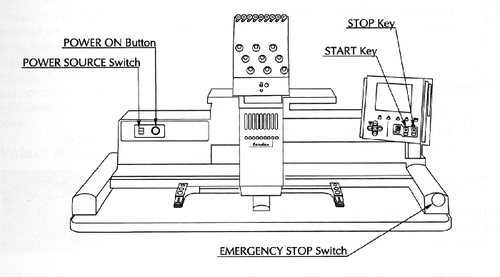
- 1.2 THE EMERGENCY STOP BUTTON SHOULD ONLY BE USED IN THE CASE OF A TRUE EMERGENCY. If an emergency stop is required, please discontinue use until the Barudan can be inspected by one of the Persons of Contact.
- 1.1 The Automat is where you will find all of the commands for operating the machine, for moving through various menus, and for executing menu commands.
- 2 Before You Mount the Hoop and Turn the Power On
- 3 Waking the Barudan Up
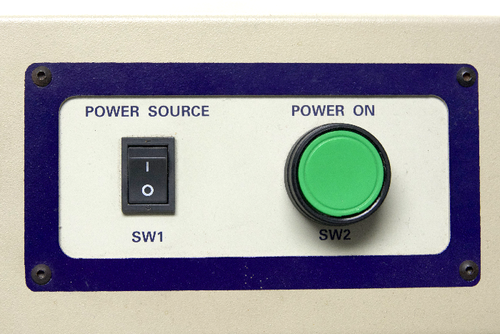
- 3.1 Turn on the power switch and press the green button.
- 3.2 If all files were removed from memory at the end of the previous session, you will see the error message shown below. It's the Automat's way of letting you know that there is no file saved in memory to be embroidered. Select the 'D' button under the checkbox icon to clear the warning.
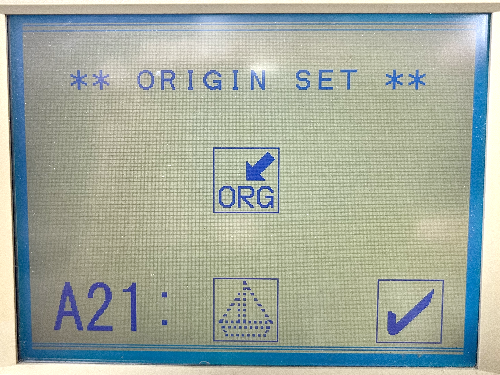
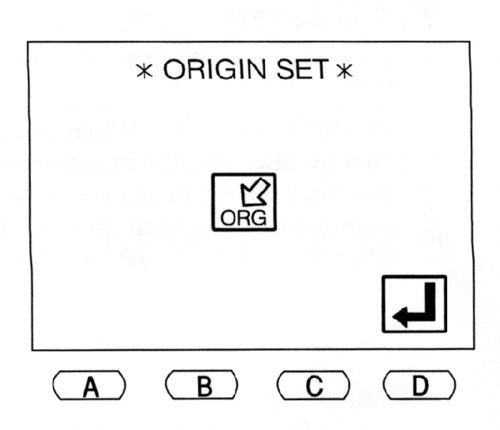
- 3.3 The next screen to appear (the first screen if there are files stored in memory) is the Origin Set Screen. Select the 'D' button under the return icon to allow the sewing head to orient itself.
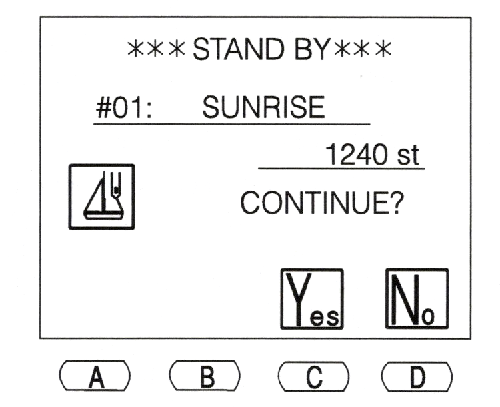
- 3.4 You may see a screen which asks if you wish to continue with the previous design. Select the button below either 'Y' or 'N', depending on your preference.
- 4 Preparing the Needles
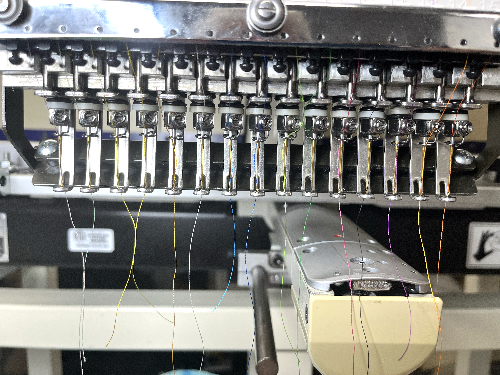
- 4.1 If you changed colors for any of the needles, threads will be hanging beneath the presser feet as shown below. Unsecured threads will become tangled in the working threads and may cause other problems.
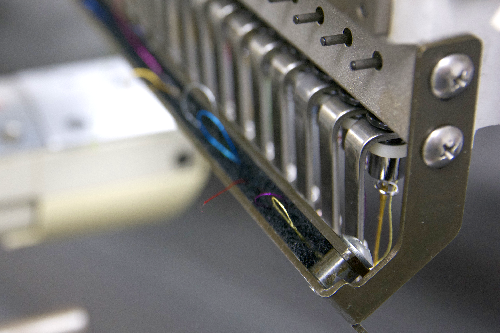
- 4.2 The Barudan is equipped with a Thread Keep, which encloses a velcro pad to keep the threads safely stored when not in active use.
- 4.3 To store the new thread properly, engage the Drive and choose the needle carrying the loose thread (You can find instructions here), then select the C button under the Trim Icon to choose Trim. Then press the Start button. You will hear four beeps and the needle will be lowered into the arm assembly, be cut, then the hook will grab the thread and pull the end back into the thread keep. If the trailing thread was long, it may appear that the thread was not cut properly. Pull the excess thread left on the surface to free and discard it. Examine the area between the eye of the needle and the thread keep; repeat the process if the thread wasn't stored properly.
- 4.4 Repeat this process for any needle which carries loose thread. Once all threads are stored, then you are ready to load your embroidery file.
Anatomy of the Automat
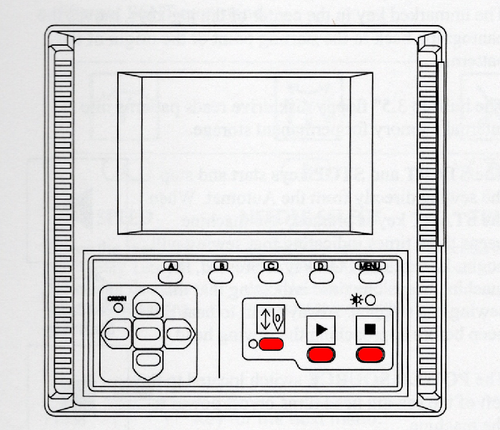
The Automat has a LCD and a series of buttons. The icons about these buttons change according to the various functions being performed during the embroidery process.
The Menu keys (A-D and Menu) correspond to the icons which are displayed above them on the LCD. The 'Menu' key moves to the next set of commands.
The set of Jog Keys allow you to move the pantograph to position the item you're embroidering under the sewing head. Pressing one of the keys moves the pantograph incrementally in that direction; press and hold a jog button to move more quickly.
The button under the Needle Icon is the Drive button. When Drive is engaged, the amber light is steady on. When the amber light is blinking, Drive is disengaged. The button under the green icon with the arrow is Start, and the button under the red icon with the square is Stop. if there are problems with the process, use the Stop button.
THE EMERGENCY STOP BUTTON SHOULD ONLY BE USED IN THE CASE OF A TRUE EMERGENCY. If an emergency stop is required, please discontinue use until the Barudan can be inspected by one of the Persons of Contact.
Before You Mount the Hoop and Turn the Power On
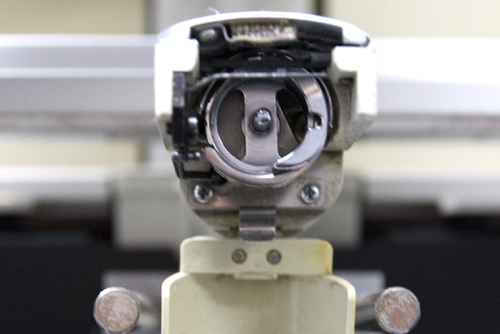
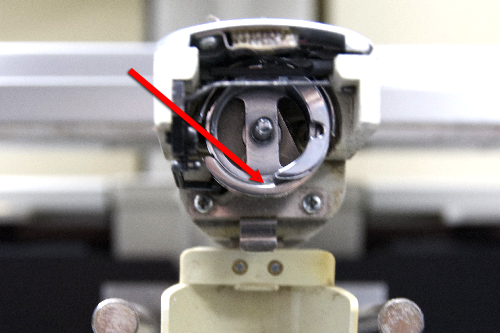
Open the Hook Assembly Arm, remove the Bobbin Case, and inspect the area to make sure there is no lint, fuzz, or loose thread in the area.
Place one drop of clear sewing machine oil at the point where the rotating hook rests. Wipe away any excess oil with a tissue or paper towel.
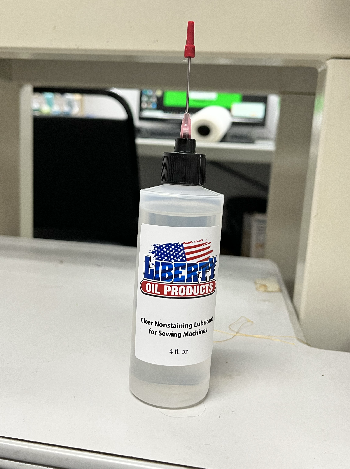
The approved sewing machine oil for lubricating the Bobbin Assembly Hook is kept on the Barudan Stand and looks like this. Do not use any other type of oil for this task.
Waking the Barudan Up
Turn on the power switch and press the green button.
If all files were removed from memory at the end of the previous session, you will see the error message shown below. It's the Automat's way of letting you know that there is no file saved in memory to be embroidered. Select the 'D' button under the checkbox icon to clear the warning.
The next screen to appear (the first screen if there are files stored in memory) is the Origin Set Screen. Select the 'D' button under the return icon to allow the sewing head to orient itself.
You may see a screen which asks if you wish to continue with the previous design. Select the button below either 'Y' or 'N', depending on your preference.
Preparing the Needles
If you changed colors for any of the needles, threads will be hanging beneath the presser feet as shown below. Unsecured threads will become tangled in the working threads and may cause other problems.
The Barudan is equipped with a Thread Keep, which encloses a velcro pad to keep the threads safely stored when not in active use.
