Difference between revisions of "How to Thread the Barudan BENT-ZQ-201U"
(→9. Pass the thread to the right of the take-up lever, then through the next (purple) thread guide from front to back.) |
(→If you are replacing a cone that is already on the Barudan, you can tie a knot connecting the new cone to the thread from the existing cone, then pull down GENTLY until the thread reaches the thread keep bar just over the needles and presser feet.) |
||
| Line 21: | Line 21: | ||
<div style="clear: both"></div> | <div style="clear: both"></div> | ||
| − | + | If you are replacing a cone that is already on the Barudan, you can tie a knot connecting the new cone to the thread from the existing cone, then '''pull down GENTLY''' until the thread reaches the thread keep bar just over the needles and presser feet. | |
| − | |||
=====Be sure that the thread feeds freely from the cone through the tubes to the front of the machine, and is not wound around the spindle or under the cone.===== | =====Be sure that the thread feeds freely from the cone through the tubes to the front of the machine, and is not wound around the spindle or under the cone.===== | ||
Revision as of 03:54, 7 March 2023
Rethreading the upper thread will be necessary if
- If the color of your choice is not already threaded on one of the fifteen needles;
- When the upper thread breaks;
- If there is an unexplained problem with the stitching.
The process may seem daunting at first, but with practice it will become second nature. Take it slowly and be patient.
Contents
- 1 To completely rethread the Upper Thread, follow these steps:
- 1.1 1. Remove the felt pad covering the first thread guide
- 1.2 2. Bring the thread through the tube to the front of the machine.
- 1.3 3. Take the thread through the slotted post of the first tensioner.
- 1.4 4. Take the thread from the left of the Pretensioner to the right of the nylon UTSM tension wheel and wrap it one and one-half times clockwise around the wheel.
- 1.5 5. Take the thread down to the left side of both the top and bottom pegs.
- 1.6 6. Pull the thread to the right of the tensioner assembly and wrap it 1.5 times between the disks and over the take-up spring.
- 1.7 7 . Thread through the top thread guide bar, then the next thread guide bar. For even-numbered needles, the thread passes through the top thread guide bar before going around the Thread Tensioner Assembly and then through the lower thread guide bar.
- 2 You should now have completed the upper portion of the sewing head. Check to be sure that the thread has not become wrapped around the tension spring for another needle's thread.
- 2.1 8. Thread through the third guide.
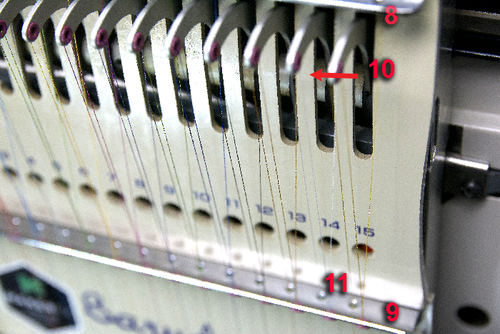
- 2.2 9. Pass the thread to the right of the take-up lever, then through the next thread guide (with the purple eyelet) from front to back.
- 2.3 10. Thread the eyelet in the take-up lever from right to left.
- 2.4 11. Thread through the next guide.
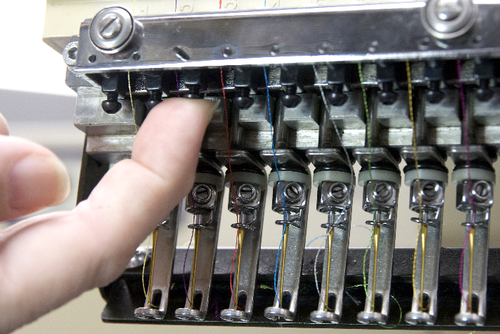
- 2.5 12. Reach underneath the apron and push the thread keep pin forward, so the thread can go through the hole, then pass the thread through the last eyelet.
- 2.6 13. Thread the small pigtail that circles the needle, either passing It through before threading the eye of the needle OR thread the needle from front to back and, holding the thread securely, pass the thread through the small opening on the right side of the pigtail.
- 2.7 14. After all needles have been threaded, replace the felt pad to avoid kinks and loops in the thread.
To completely rethread the Upper Thread, follow these steps:
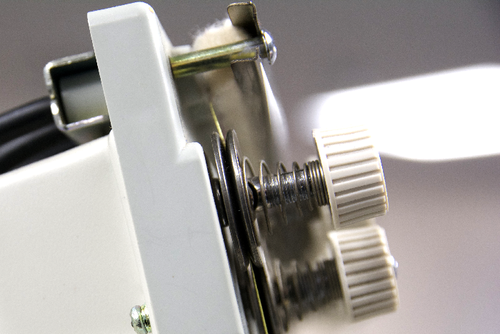
1. Remove the felt pad covering the first thread guide
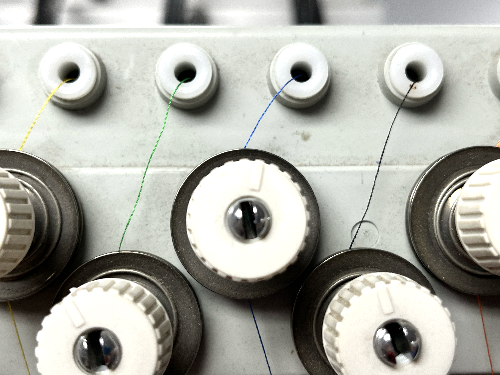
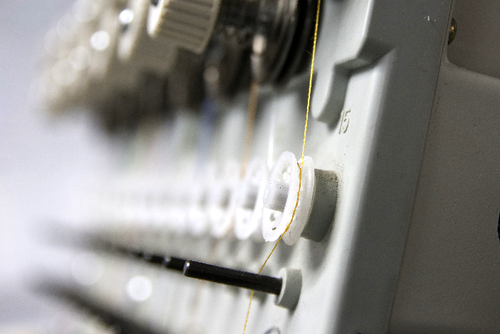
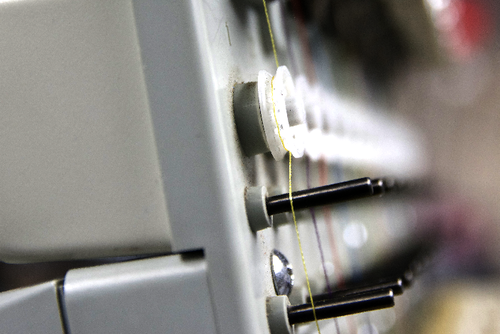
2. Bring the thread through the tube to the front of the machine.
If you are replacing a cone that is already on the Barudan, you can tie a knot connecting the new cone to the thread from the existing cone, then pull down GENTLY until the thread reaches the thread keep bar just over the needles and presser feet.
Be sure that the thread feeds freely from the cone through the tubes to the front of the machine, and is not wound around the spindle or under the cone.
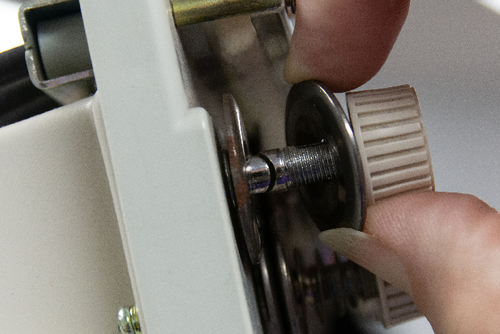
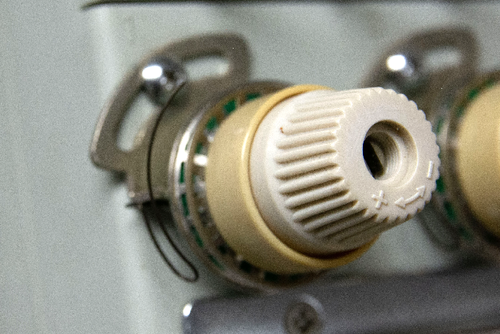
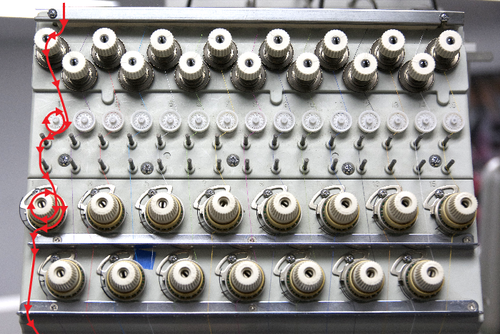
3. Take the thread through the slotted post of the first tensioner.
You are placing the thread through the slot on the post that holds the two disks. Grasping a section of thread between your hands, place between the disks and pull forward until you feel the thread settle into the slot on the post. Then release the thread and continue.
4. Take the thread from the left of the Pretensioner to the right of the nylon UTSM tension wheel and wrap it one and one-half times clockwise around the wheel.
5. Take the thread down to the left side of both the top and bottom pegs.
6. Pull the thread to the right of the tensioner assembly and wrap it 1.5 times between the disks and over the take-up spring.
NOTE: to ensure proper threading, pull the thread down, and check that the take-up spring bounces up and down with the thread movement.
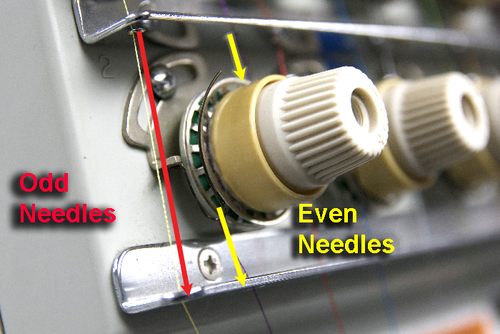
7 . Thread through the top thread guide bar, then the next thread guide bar. For even-numbered needles, the thread passes through the top thread guide bar before going around the Thread Tensioner Assembly and then through the lower thread guide bar.
You should now have completed the upper portion of the sewing head. Check to be sure that the thread has not become wrapped around the tension spring for another needle's thread.
8. Thread through the third guide.
9. Pass the thread to the right of the take-up lever, then through the next thread guide (with the purple eyelet) from front to back.
10. Thread the eyelet in the take-up lever from right to left.
11. Thread through the next guide.
12. Reach underneath the apron and push the thread keep pin forward, so the thread can go through the hole, then pass the thread through the last eyelet.
13. Thread the small pigtail that circles the needle, either passing It through before threading the eye of the needle OR thread the needle from front to back and, holding the thread securely, pass the thread through the small opening on the right side of the pigtail.
14. After all needles have been threaded, replace the felt pad to avoid kinks and loops in the thread.

